The Frustration That Started It All
Like many of you, I was pretty happy with my Bambu Lab printers. But that built-in camera... oof. It's like watching a slideshow rather than a video stream. This isn't just annoying - it makes it nearly impossible to enjoy watching it print remotely!
I decided to take this problem into my own hands. After a month of work and many prototypes, I'm excited to share the solution with you—absolutely free!
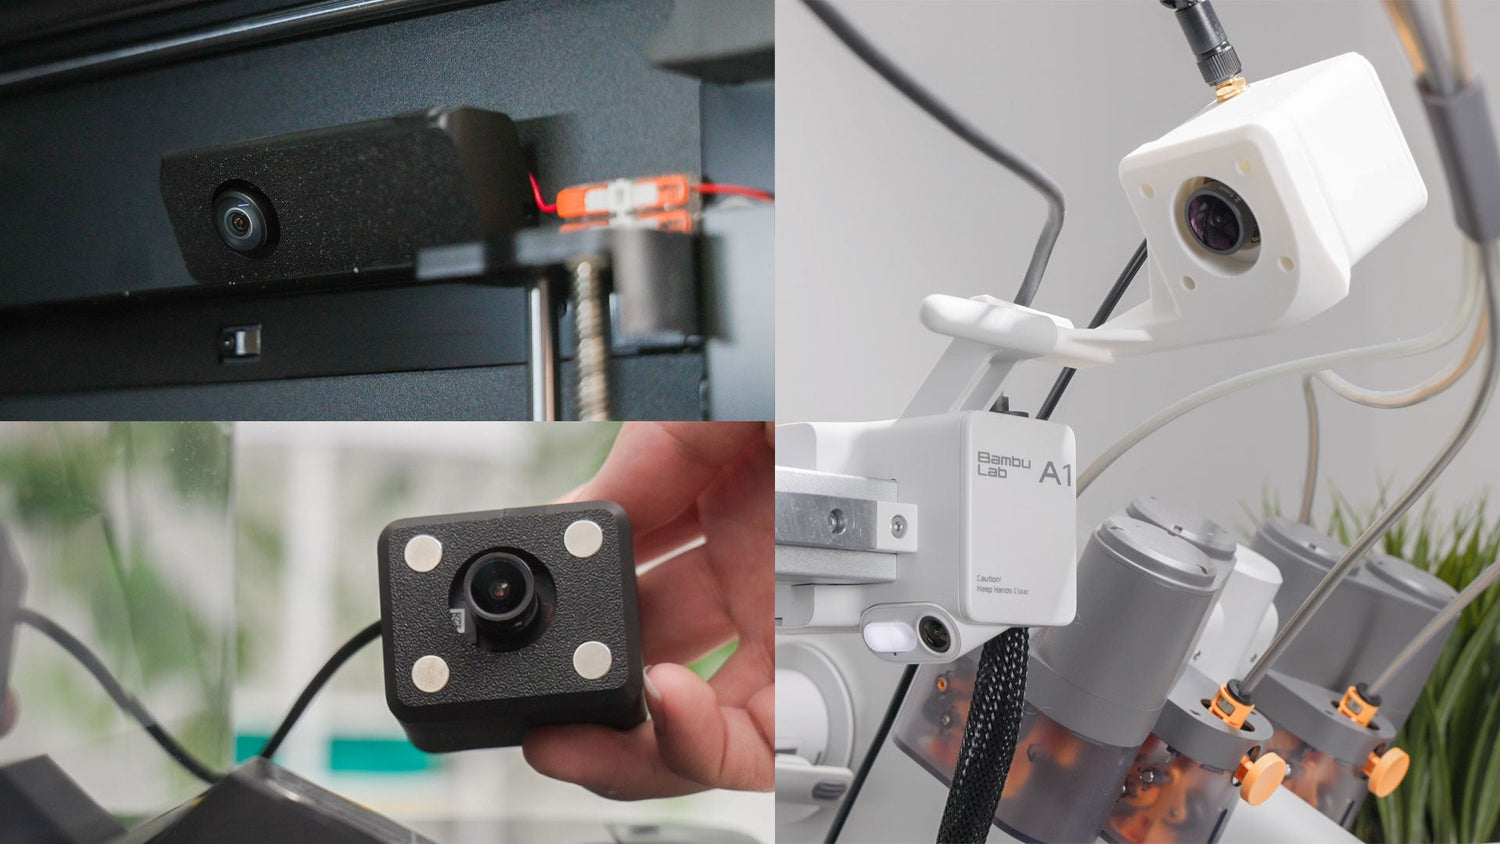
Introducing Learn3DP Cam
I've taken the electronics from an affordable Wyze Cam V4 and redesigned the enclosure to make it work perfectly with Bambu Lab printers. Here's why I think you'll love it:
- Smooth 2K video instead of laggy snapshots
- Perfect fit designs for P1S, A1, and A1 Mini
- Multiple mounting options - hide it inside your P1S or use the magnetic mount
- Uses less filament than other Wyze camera mounts I found online
- Better view angle - lens sits close to the glass, eliminating the black border effect
- Easy to build - if you can operate a screwdriver & soldering iron, you can make this!
Two Design Options to Choose From
1. P1S Internal Camera (P1S Only)

This is my personal favorite for my P1S. It sits perfectly under the gantry inside the printer, connects to the internal USB port, and gives you a clear view of your print bed.
Since it's 100% internal, there is no massive camera or cable dangling outside of your printer!
2. Magnetic Mount Version (P1S, A1, and A1 Mini)

This versatile design works with Bambu Lab P1S, A1, and A1 Mini. For the P1S version, tape the magnetic mount to your printer's glass panel. The A1 / A1 mini version attaches to the X-axis motor.


Want to learn the exact method I used to design 3D models?
Check out my Custom 3D Printing course! You'll find bite-size video lessons, hands-on projects, and expert support just a click away!
Building Your Own Learn3DP Cam
What You'll Need:
- Wyze Cam V4
- USB power cable (or reuse the included cable)
- Heat resistant double-sided tapes (for P1S Internal Only)
- 8x2mm magnets (for Magnetic Mount Only)
- Precision Toolkit
- Heat gun (for easier antenna removal & lens adjustment, not required)
- Soldering iron
- About 1 hour of your time
Step 1: Print Your Camera Housing & Mount
First, download the appropriate files for your printer model and preferred mounting style:
P1S Internal Camera 3D File (P1S Only):
Learn3DP members: You can access the editable CAD files in your member's library
These files are licensed under CC BY-NC-SA 4.0

Magnetic Housing & Mounts 3D Files:
- Magnetic Camera Housing (Download)
- Magnetic Camera Cover (Download)
- P1S Magnetic Mount (Download)
- A1 Magnetic Mount (Download)
- A1 mini Magnetic Mount (Download)
Learn3DP members: You can access the editable CAD files in your member's library
These files are licensed under CC BY-NC-SA 4.0


Print Settings I Used:
- Material: PLA, but if you print high temp materials, you can print your enclosure with ASA or PA.
- Layer Height: 0.2mm
- Infill: 15%
- Support: Tree, on build plate only.
Why is the lens opening so big?
To allow the use of 3rd party M12 lenses like these.

Step 2: Setup the Wyze Cam
Since we'll be removing the circuit board that contains the Setup button ⑧ from the Wyze Cam, you must first set up your Wyze Cam to connect to Wi-Fi and the app.

Step 3: Take Apart the Wyze Cam
1. Remove the front bezel
2. Remove the 3 screws holding the front module
3. Disconnect front module's two connectors
4. Remove motherboard's screws and disconnect ribbon cables
5. Remove two screws holding the sensor module
6. Remove the flexible antenna
The tape holding it down is very strong, you can use some hot air to soften the glue.
Optional: Improve the Focus
The stock Wyze lens is focused for typical security camera distances (to infinity). By slightly adjusting it, we can get much sharper images of our prints:
- Use a heat gun on low setting (or even a hair dryer) to gently warm the lens area
- Once the glue softens slightly, carefully remove the glue using a tweezer
- Test and adjust until your prints appear crisp and clear
(Video Coming Soon)
Step 4: Assemble Your New Camera
1. Securely attach antenna to the 3D printed housing as shown
2. Screw the camera board onto the 3D printed housing
3. Connect motherboard's ribbon cable & connect antenna
4. Secure the motherboard & finish!
For magnetic versions: insert magnets into slots


Step 5: Mount and Connect
For P1S Internal:
- Solder two wires to the camera's power connector (for easy removal)

- Install back plate (optional)
- Route the USB power cable to the internal USB port (behind the display)

- Connect the USB power cable & the two wires we've soldered using WAGO connectors (or similar)

- Tape the camera & WAGO connectors into position under the gantry
For Magnetic Mount:
- Solder the USB power cable directly to the camera's power connector
- Assemble the camera
- Attach to magnetic mount
- Connect power
Thank You for Reading!
This project is continuously evolving. If you have any ideas for improvement, please let me know in the comments!

Leave a comment
All comments are moderated before being published.
This site is protected by hCaptcha and the hCaptcha Privacy Policy and Terms of Service apply.